Lab 9: ER Madness: Prioritize, Treat, Repeat!
Objective
The objective of this lab is to simulate the patient queue management system in a hospital emergency room. We will implement the queueing system using a linked list. Patients may have high priority based on the severity of their case.
It is due April 5, 2025 at 11:59 PM.
Learning Outcomes
- Apply the understanding of a singly linked list.
- Manage dynamically allocated data using insertion, deletion, and traversal.
Grades
This lab is worth 10 marks, as follows:
- 5 marks for the public test cases.
- 5 marks for the hidden private test cases.
You can always see your public test cases automarker grades here APS105 after every submission. They are out of 5.
There is no in-person lab marking for this lab.
Instructions
-
Go to your GitHub repo from lab 0 by following this link:
https://github.com/compeng-gg/2025-winter-aps105-<UTORID>, where you'll have to replace<UTORID>with your UTORid. -
Open the same codespace you created for lab0. You should not create any other codespaces.
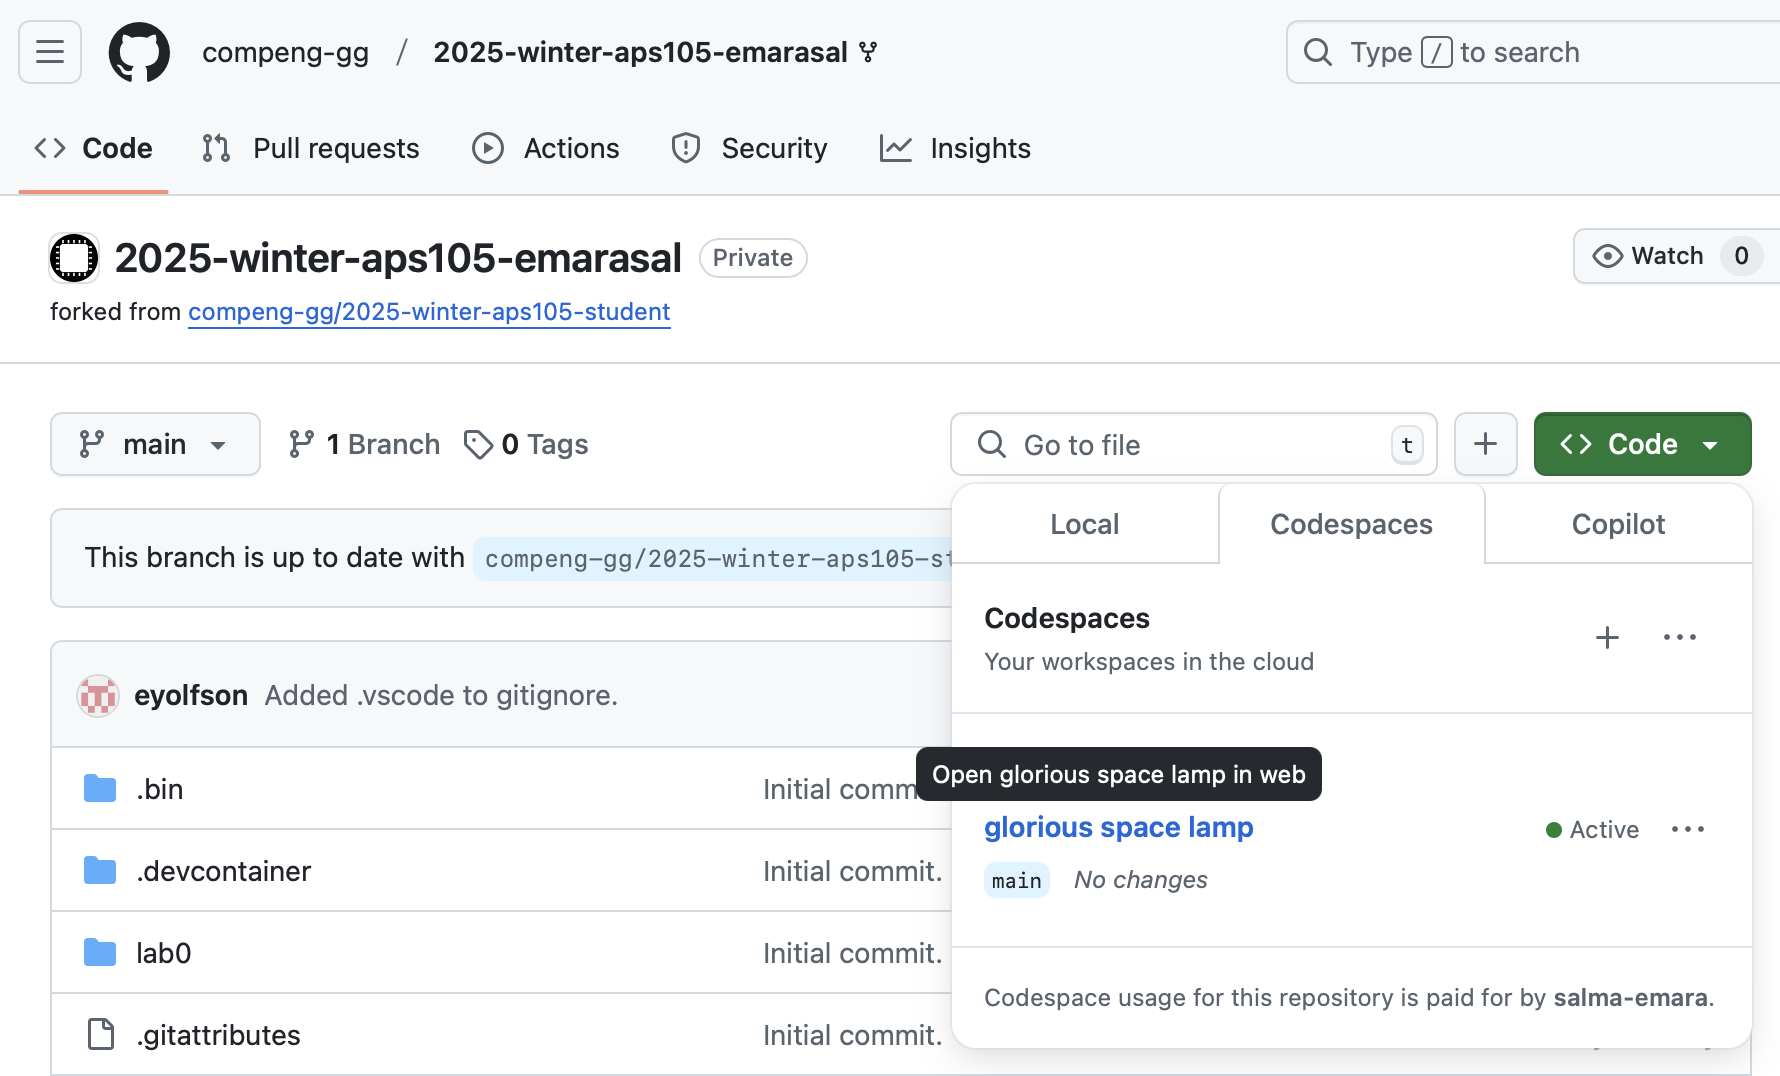 Fig.1 Existing codespace created in your GitHub repository
 -
In the terminal, type in the following command to transfer (pull) lab 9 material into your codespace:
pullThis will do a "pull" (which gets files from the "student" repository, containing starter code). This helper command will make sure you commit all your changes before you can start Lab 9. You should always commit (and push) your changes!
-
You should see a folder called lab9 in your repository.
Important! If you're using the codespace to save the lecture notes, you'll get "You must commit all your changes (check
git status)". To resolve this, you may use the following command instead:git pull upstream mainIf you get the following error, please press on
Ctrl+Xfor Mac and Windows.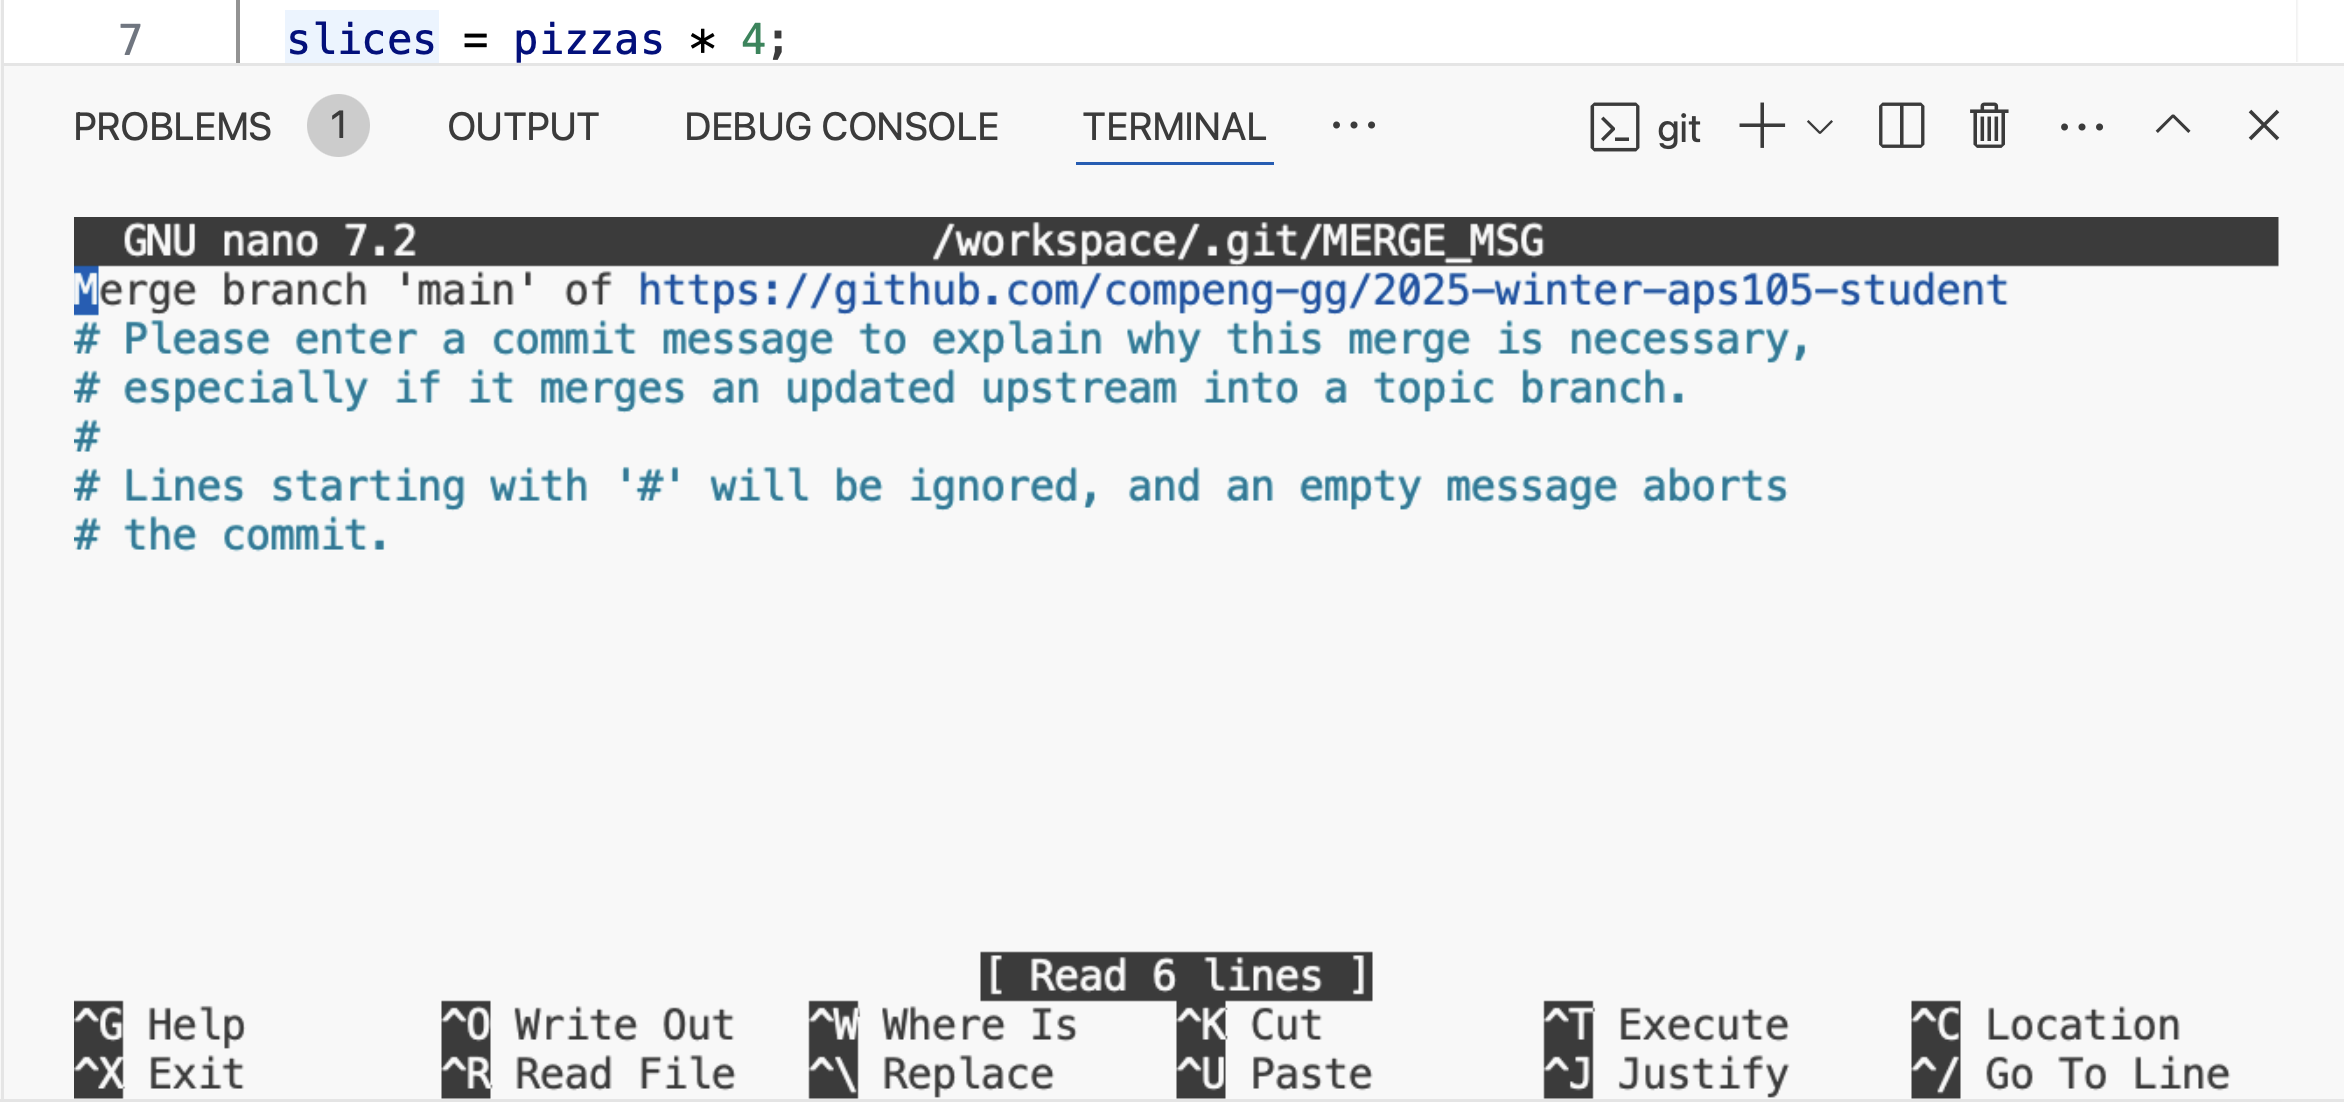 Fig.2 Merge pull messagenote
If you are using the Codespace please ignore these steps. For students NOT using the Codespace, first do:
git remote add upstream git@github.com:compeng-gg/2025-winter-aps105-student.gitYou only need to do this once, then after you'll use:
git pullThis command gets the starter code for the lab.
Description
In this lab, you will simulate a hospital emergency room queue where patients are added, treated, or removed based on priority and arrival order. You will implement a dynamic singly linked list to manage patients, ensuring that patients with higher severity levels are always prioritized, while those with equal severity are queued based on arrival order. You will practice working with dynamic memory allocation, linked list traversal, insertion in sorted order, and removal of specific nodes from the list.
Through this simulation, you will gain hands-on experience with real-world data structures and improve your understanding of how dynamic queues are used in healthcare systems to manage patient flow.
Lab Requirements
-
Patient Node Structure:
- Each patient node should be a data structure in your linked list and it should include:
ID: An integer, unique for each patientname: A string with a maximum of 100 characters. There will be no whitespace in patient names.severity: An integer, where a higher number indicates higher severitynext: A pointer to the next node)
- Each patient node should be a data structure in your linked list and it should include:
-
Queue Data Structure:
- The linked list should have a data structure that has a pointer to the
headnode in the linked list
- The linked list should have a data structure that has a pointer to the
-
Queue Operations: Your program should support the following operations:
- Add Patient (
A <ID> <name> <severity>):- Read a character, integer, string and an integer (inputs are separated by spaces).
- You should call a function that
- Checks if a patient with the same ID already exists, prints an error:
Error: Patient <ID> already exists.(followed by a newline character) if it exists and does not add the patient. - Otherwise, creates a node with
IDset to<ID>,nameset to<name>and severity to<severity> - Inserts the new patient node into the linked list based on severity level and arrival order.
- Higher severity patients are placed closer to the front of the queue, and patients with equal severity wait in line based on order of arrival. For example, a patient with
5as a severity level should be placed in front of all patients with severity level4or below. - After adding a patient:
Patient <ID> Added.(followed by a newline character) - For example, in the image below, we show four different commands that add 4 different patients into the queue system. Observe that patients with higher severity level number are at the front of the list.
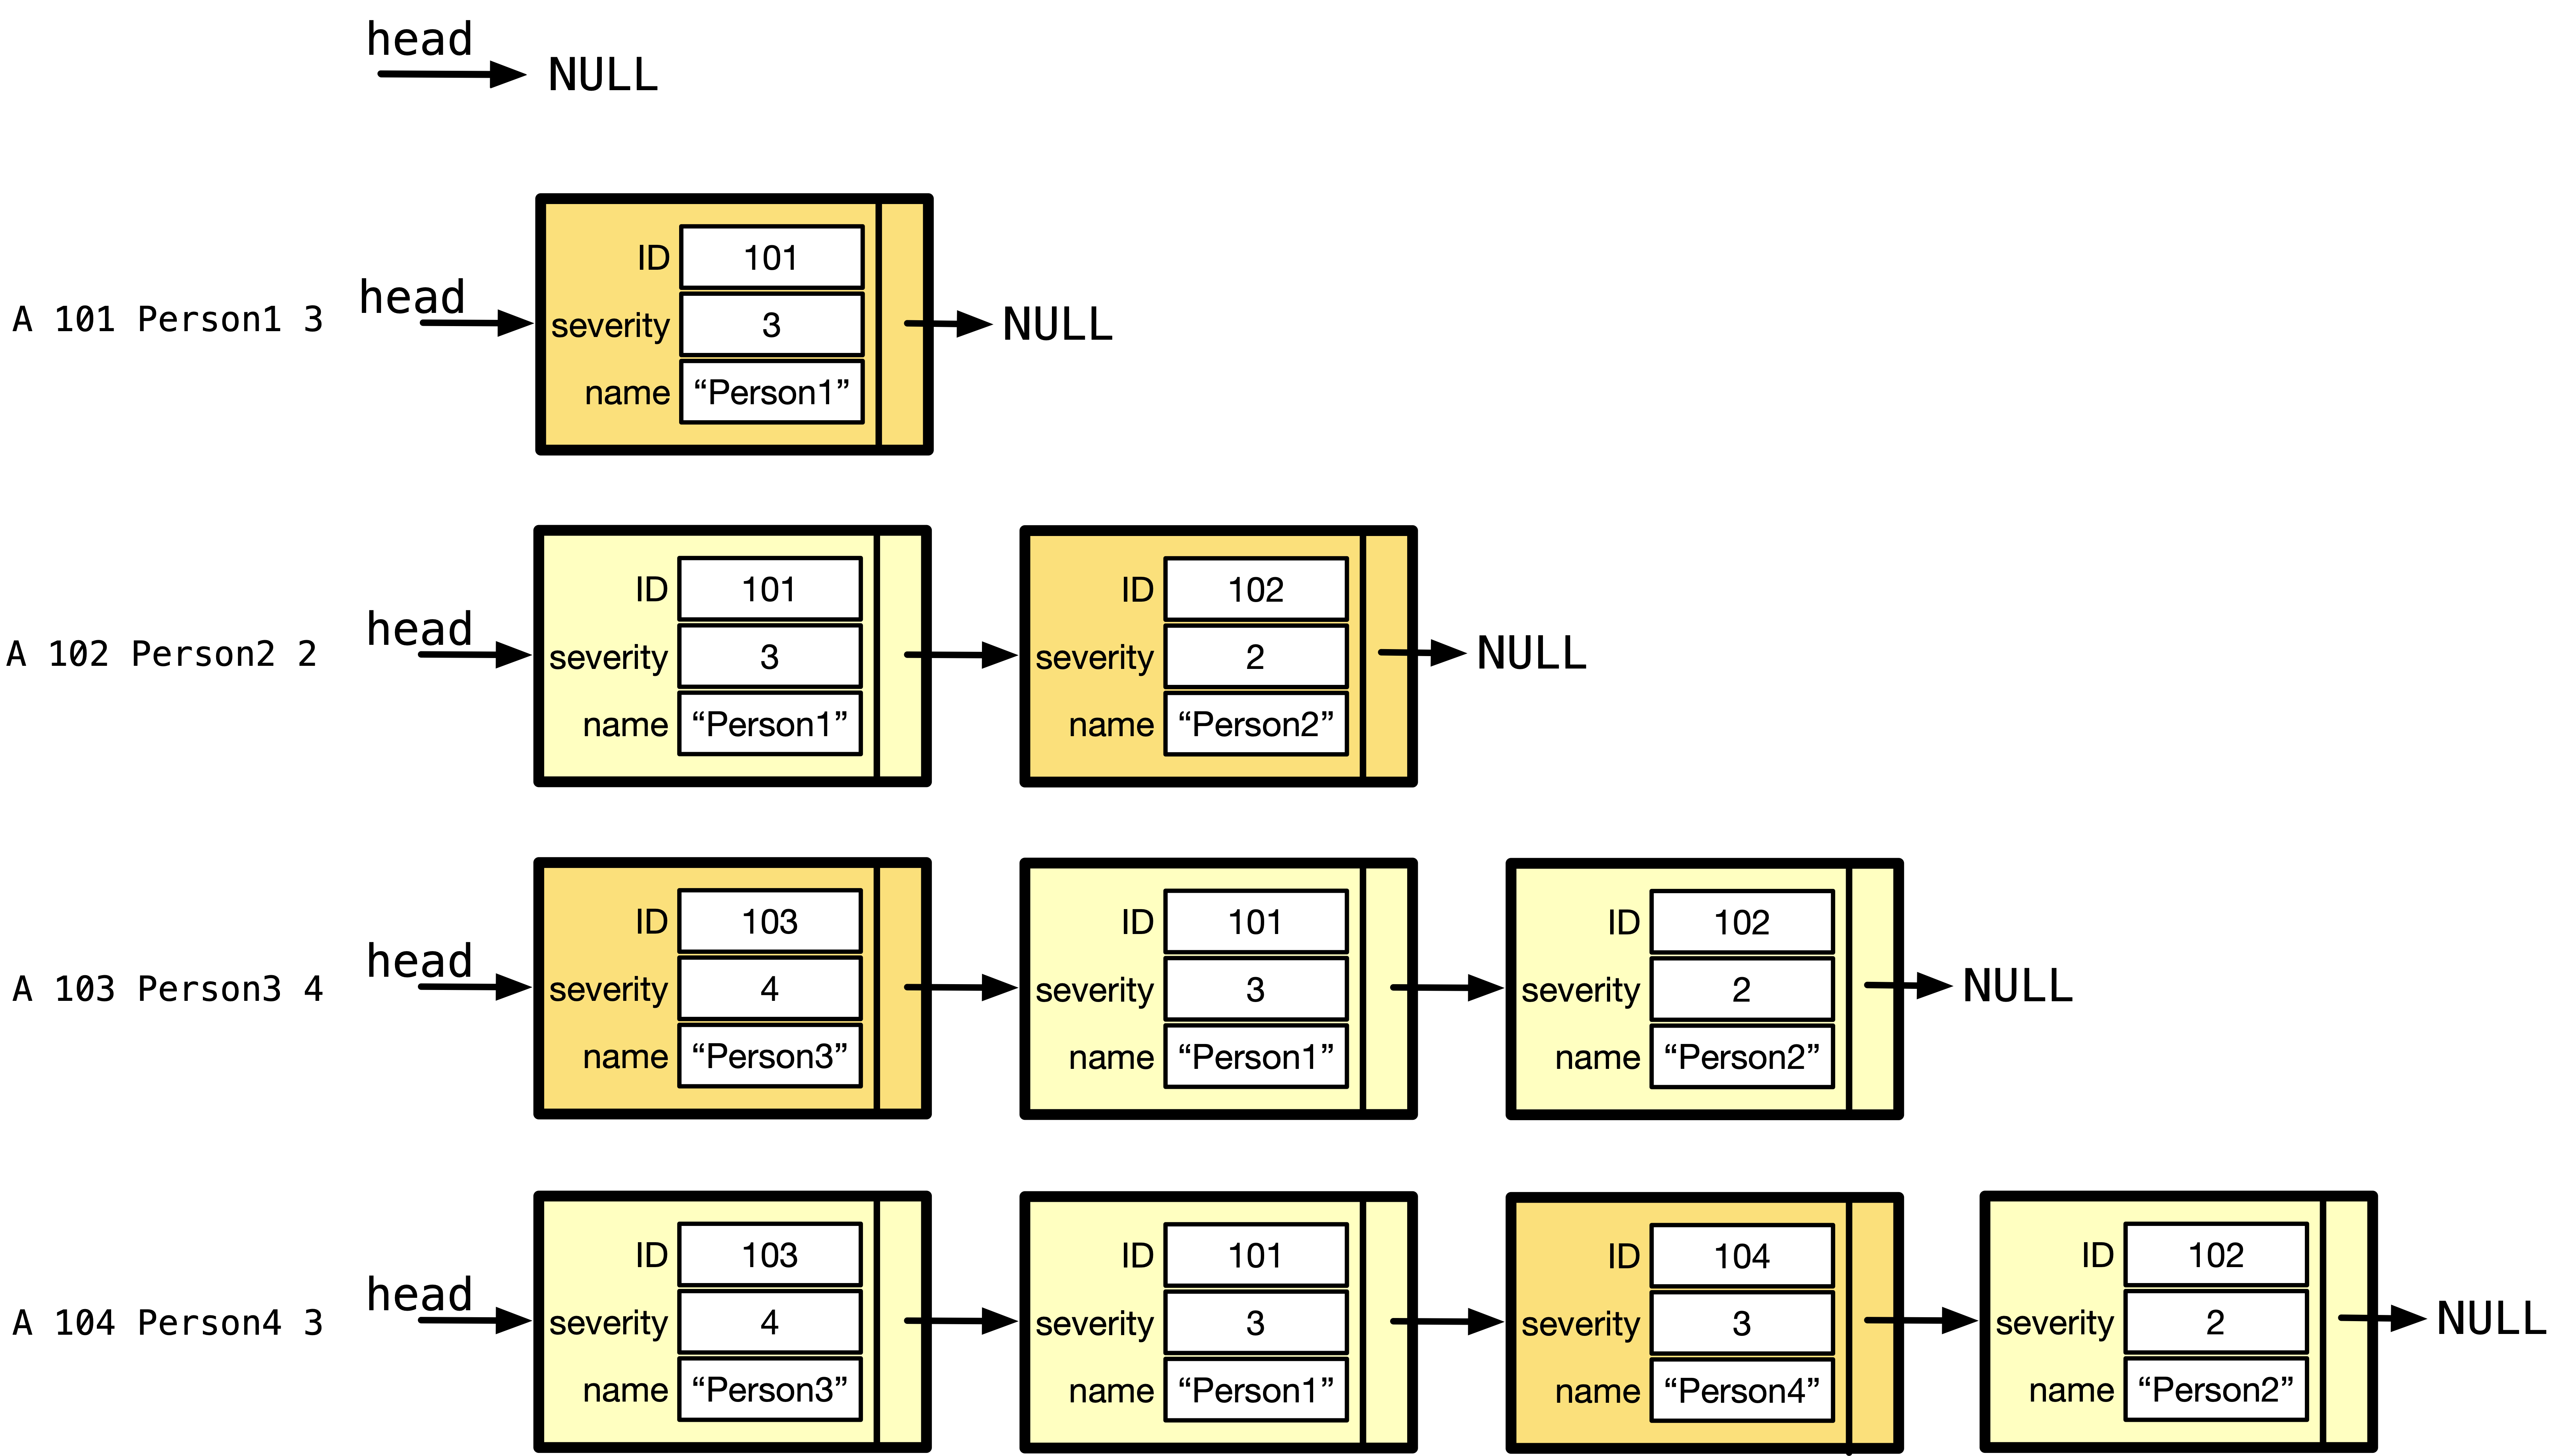 Fig.3 Add four patients with different severity
- Checks if a patient with the same ID already exists, prints an error:
- Treat Patient (
T):- You should call a function that
- Removes the patient at the front of the queue (highest severity) and print
Patient <ID> Treated.(followed by a newline character) - If no patients are in the queue, prints
Queue is empty.(followed by a newline character)
- Removes the patient at the front of the queue (highest severity) and print
- You should call a function that
- Remove Patient (
RID):- You should call a function that
- Searches for a patient by ID, removes them, if found and prints
Patient <ID> Removed.(followed by a newline character) - If the patient is not found, print:
Error: Patient <ID> not found.(followed by a newline character)
- Searches for a patient by ID, removes them, if found and prints
- You should call a function that
- Display Queue (
D):- You should call a function that
- Displays all patients in the queue, showing their Name and Severity Level on separate lines.
- If the queue is empty, print
Queue is empty.(followed by a newline character)
- You should call a function that
- End Program (
Q):- You should call a function that
frees all dynamically allocated space to avoid memory leaks.- Exit the program.
- You should call a function that
- Add Patient (
Input Format
Each input will be a character specifying an operation, followed by any required data values:
A <ID> <name> <severity>- Add a patient with given ID, Name, and Severity.T- Treat (remove) the patient at the front of the queue.R <ID>- Remove the patient with the given ID.D- Display the queue.Q- End the program.
Sample output, where the input is shown in bold:
Example 1:
A 101 Jane 1
Patient 101 Added.
A 201 Mary 2
Patient 201 Added.
A 301 John 4
Patient 301 Added.
A 201 Mary 1
Error: Patient 201 already exists.
D
John 4
Mary 2
Jane 1
Q
Example 2:
A 101 John 5
Patient 101 Added.
A 101 John 5
Error: Patient 101 already exists.
R 999
Error: Patient 999 not found.
T
Patient 101 Treated.
T
Queue is empty.
D
Queue is empty.
Q
Testing and Submission
-
Create a new file called
lab9.cin thelab9folder. -
Compile your code, and run it to produce the output shown above. You can use the handy buttons shown below.
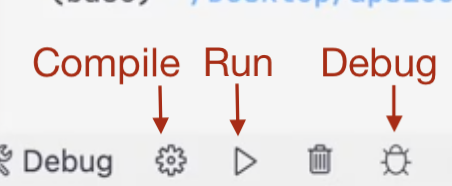
Fig.3 Handy buttons to compile, run, and debug your C program.
You can also compile using the terminal using
compilecommand, and run usingmeson-build/lab9command. You shouldcd /workspace/lab9before running these commands. -
Once you have the correct output, go to the terminal and test your program against the test cases by typing the following commands:
cd /workspace/lab9
test
-
Common Issue. Many students find it difficult to notice differences between their output and the expected output. If you are having trouble,
- View inputs of a test case, e.g., if you failed test case 1, you can view the input by opening
lab9/test/public/inputs/lab9-1file. - View outputs of a test case, e.g., the output of the test case is in
lab8part1/test/public/outputs/lab9-1file. - Use the
compilecommand to compile your program. - To get the output of test case 1, use
meson-build/lab9 < tests/public/inputs/lab9-1command. This will produce the output of test case 1, that has inputs intests/public/inputs/lab9-1file. - Copy the output of your program and the output in
tests/public/outputs/lab9-1 - Open CheckDiff, paste the two outputs in respective boxes, and click on
Find difference. This will highlight the differences between the two outputs.
- View inputs of a test case, e.g., if you failed test case 1, you can view the input by opening
-
If your program passes the public test cases, you can submit your code by typing the following commands.
git add lab9.c
git commit -m "Lab 9"
git push